An installer came to the bulletin board with a pattern-elongation problem. The job was direct glue-down on concrete. Two of the shots were 47 feet, and the pattern was 4-inches off. After attempting to move the pattern with a knee kicker, he was at a loss as to what to do next.
The first thing is to contact the manufacturer and advise them of the problem. Seek the help of the technical support department; the installers on staff there are highly skilled and knowledgeable, and they are there to help. Andrew Aufiero, who works in that capacity for a carpet manufacturer, thinks they keep him around because he’s cute. I’d say his expertise has something to do with it as well.

For stretching the pattern, use a power stretcher; knee kicking is for the birds. Assuming it is a level-loop or commercial cut-pile carpet, buy a cotton head for the stretcher (photo 1). A cotton head has no teeth, just nap grips, so it will not tear up a glue-down carpet or ruin the stretcher’s teeth by dragging them across the concrete.
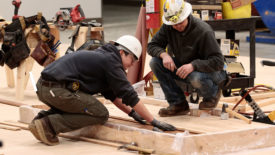
Make a "deadman" to allow for stretching from anywhere in the room. This requires tackstrip and a 4-foot length of 2”x12” or 2”x16”. Cover one side of the board completely with tackstrip, making certain all the pins point in the same direction (photo 2).
Next, stretch up the short side. The best approach is to start in the middle; this cuts the distance that has to be stretched, while making it match in half. Instead of a 47-foot seam that is 4-inches off at the end, there are two 23 ½-foot seams 2-inches off at the end, and they are much easier to deal with.

Spread the glue in an 8-by-24-foot area. Lay the carpet into the glue, and stay-tack the center where the pattern is straight. It can be done, even on concrete. I like to use 1-inch concrete pins. Make sure to get the shiny silver ones that used to be referred to as "perma-clean;” some masonry nails will leave a grease stain on light-colored carpet.
Don’t drive the nails all the way in, just give one good hit to set the tip. Installer Jackie Jones uses a piece of architectural (double-wide) tackstrip, puts it on top of the carpet, and nails through the carpet into the floor. The tackstrip holds the nail, allowing a hard swing. Placing the nails every 6 inches to hold the wood strip tight to the floor helps hold the pattern straight.

After the glue has set, continue with the seam, working the remaining parts in the same fashion, stretching and stay-tacking. It will probably be necessary to straighten out the pattern in the field as well. Use a dry line (chalk line with no chalk) to help check that the pattern is straight across the width. If not, stretch and stay-tack with the stretcher and deadman as at the seam
Remember the chalk line? When the sides are folded back to allow the rest of the room to be done, the installer will greatly appreciate the straight line the glue was stopped at now that it's set up.
There are many installers who by now are thinking, “Wow, that sounds like a lot of work and time!” Yes it is. That is why it is important to know exactly what installations with patterns involve, and to charge accordingly.