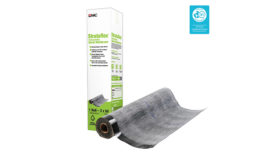
Photo 1: Fitted sheet membrane ready to be adhered to the subfloor.


Photo 2: Detail shows finished, grouted tiles, backer rod stuffed into the base of the movement joint slot, and the finished edge of the wood flooring.
Ancient tile installations were built on massive structures that completely shielded the tiles from movement or temperature fluctuations. Movement within a structure, especially shear forces, can crack, dislodge, or otherwise damage tiles and the ruin the appearance of the tile installation. To guard against this, the tile industry requires that tiles be shielded from expected movement by a network of movement joints. For most residential floors, this simply means establishing a joint, around the perimeter of the floor tiles, which is filled with a resilient material, instead of grout. Larger floors, and exterior floor tile installations, need wider and more frequently spaced movement joints, and the information needed to help make these determinations can be found in the TCA Handbook (Contact the TCA at 864-646-8453, or log onto www.tileusa.com ).

The junctions between floors and walls, between neighboring walls, and between tiles and other materials are where structural or thermal movement is concentrated, and thus the need for movement joints. Movement joints are also required in any tilework installed directly over existing movement joints, or wherever the tiles are installed over two different substrates. Movement joints are essential whenever the plane of tiles is interrupted by pipes, conduit, or other penetrations; the lack of movement joints can make replacing or repairing plumbing valves and the like extremely difficult.


Photo 3: Shooting color-matched sealant into the movement joint slot.
Of particular interest to floor covering installers are perimeter movement joints. These can be especially simple to produce if the edges of the floor will be covered with a baseboard molding; the empty joints can simply be filled with whatever flexible caulk or sealant is available since the joints will be covered by the molding. When the movement joint will be visible, though, the flexible joint-filling material should match the appearance of the grout. The manufacturers of most national brands of grout and mortar also make movement joint fillers that are color-matched to the grout. Some are also available with added sand so that they mimic the appearance of sanded grout and are all but invisible.

Movement joints, unlike tile and other tile installation materials, will wear out and need periodic replacement. This should be considered with any warrantee you might provide your customer. Maintenance of the movement joints is important to the longevity of the tile installation, especially if the installation is in a wet area.

Sometimes, if there are movement problems with a substrate, or if waterproofing is required, a membrane system may be required for a successful tile installation (Photo 1). Membrane systems may be comprised of a factory-made sheet that is adhered to the substrate, or liquid/fabric combinations. Membrane systems are available for waterproofing, crack isolation, and for sound reduction. Without exception, all membrane systems require that movement joints be included in their installation to ensure reliable results, and this is especially true for crack or movement isolation membrane systems that must also insulate the edges of the tile installation from normal and expected movement within the structure.


Photo 4: Close-up of finished floor
Many installers complain that movement joints are difficult to produce, but most complaints are because installers do not figure movement joints into their bids, estimates, or proposals. This is hard to understand since movement joints are so easy to produce and require only that a minimum 1/4-inch joint be maintained between the outer edges of the tiles and any hard surface. The basic minimums that are needed for basic tile work are also required for art and decorative tile installations. The photos used in this article were taken during the installation of a Spectrum-winning floor installation I did for Michelle Griffoul Studios.

The tiles were hand-made, shaped like leaves, were to be inset into a maple strip floor. The challenge was to enclose the relatively stable tiles with the highly moveable wood strip floors. Installing hard grout between the tiles and the wood strips would result in an unsightly crack. This installation called for an elaborate movement joint that would add to the installation, but which would require extensive reworking of the existing wood strip flooring, the substrate, and the structure.


Photo 5: Finished floor
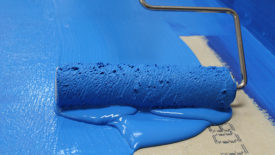
The existing 4-by-6 framing was supplemented by the addition of 1-by-12s on 16-inch centers; as well, the edges of the 1 1/8-inch plywood were supported by 1-by-12s. Before tiling, the subflooring was also covered with a sheet crack isolation membrane. The 3/4-inch thick maple strip flooring had to be extensively reworked with a router in order to produce a uniform 1/8-inch wide movement joint slot. This was done by tracing around the tiles, roughing with a 1/2 diameter router bit, then using a 1/4-inch, and finally, a 1/8-inch bit to finish the floor whose edge was then protected with two coats of sealer. Next, the membrane was fitted and installed, the sheets of mounted tiles were set in a bed of latex thinset mortar, and the tiles were grouted (Photo 3). When the grout was firm, but not quite hard, the movement joint slot was cleared of all excess grout or adhesive, and the tiles were allowed to sit 72 hrs.


The final step was to install the sealant, and the result was an award-winning floor that, after two years, looks as good as the day it was finished (Photos 4 and 5).