Photo 1: Shown here is an example of an expanded polystyrene shower base used in lieu of the conventional mortar system.
Without a doubt, relative to the amount of them constructed, there seems to be no installation that fails more often than the good old shower stall. Many of those in days past were doomed to failure from the day they were constructed, being waterproofed primarily by cooper and lead liners. There are those areas of the country where these methods, along with hot mop asphalt, are still employed. In several areas they are required by code. Depending on type, installation, and length of use, those too will fail. So what constitutes failure? The unexplainable leak. When will it occur? Who knows, maybe 20 years, could be 100 given all the variables. Such is the life of all metal based waterproofing liners given their chemical incompatibility with cement and water.

Photo 2: Shown here is a weep protector, one of many inexpensive and widely available products designed for this purpose.
Modern technology has given us new materials to work with that are resistant to the degradation of materials used in days past. We now have various types of sheeting and polymer compounds that will last indefinitely, so they say. Application of these products require a substantially less skill than those of days past, however, they like their predecessors are very unforgiving of installer error.


Diagram 1
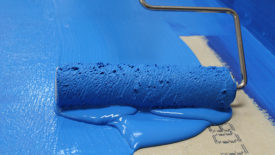
Thinking of a title for this article was somewhat challenging. I was going to call it "How to Build a Shower Stall," but there are many ways to build a good waterproof shower. Though we are going to address the traditional shower stall, there are numerous products available today to help us achieve that lasting installation we want to provide our customer. Photo 1 shows an example of an expanded polystyrene shower base used in lieu of the conventional mortar system. This premade base is covered with a topically applied membrane. There are numerous premade curb units, niches, and even shower seats on the market. We also have the ability to waterproof any surface, even drywall, for a successful installation. New products available today make it possible for virtually anyone who can read and follow instructions to construct a waterproof shower stall over nearly any surface. The margins for error using these modern materials are slim, in some cases, thousands of an inch slim as in the case of trowel on or roll on membrane systems.

Photo 3: The corner shower here bonds with a sealant and provides a 2-inch overlap for a leak-free installation.
If assistance is needed you will find every manufacturer ready, willing, and able to provide all the clarification and information you need free of charge.

The conventional shower stall built of either entirely of mortar, or a combination of a mortar floor and backerboard is still the most popular method of construction.

Photo 4: To test the pan, remove the top part of the drain and install a plug below the weep holes.
Diagram 1 shows the basic requirements of a shower stall. One of the most often emitted steps to a long lasting installation is the pre-pitch of the waterproofing. Universal Plumbing Code recommends a pre-pitch of 1/4-inch per foot. This pitch can be achieved by many methods, the easiest being the purchase of one of the many pre-made foam units.

Photo 5: Place 16 gauge galvanized reinforcing wire in the bottom of the shower base.
You may also establish this pitch by installing 15-pound roofing felt or 4 Mil plastic, 2.5 metal lathe stapled to the floor, and troweling a layer of mortar or similar product. The liner is then installed over the prepitch allowing for uniform thickness of the mortar in the shower base.

One thing mortar readily does is absorb water. It is a common misconception that tile and grout make a surface waterproof. Grout will readily absorb and pass water through to the mortar shower base. This water should pass through small holes known as weep holes in the bottom of the drain. It will not pass readily if the membrane is lower than the holes in the drain. The water will instead collect and harbor all things carried with it. Given the proper circumstances, this can lead to mortar degradation and mold, a very sensitive issue these days. Even with the pre-pitch, the weep holes need to be kept open. Photo 2 shows a weep protector, one of many inexpensive and widely available products designed for this purpose. You can also use pea gravel, spacers, even broken pieces of tile for the same purpose. This works much like a drain tile; you need to have a space for the water to collect so it passes through the weep holes into the drain. If you do not provide some type of collection area at the shower weep holes, their effectiveness is greatly diminished.

Local plumbing code will dictate how high the membrane must be installed and whether corners or jambs must be covered and how high. The universal plumbing code used by many local plumbing codes says the membrane should extend three inches above the curb all the way around the shower, including jambs, and wrapped around the curb, fastened on the face. One of the areas most prone to leaks is the joint where you must cut the membrane to go over the curb. Most manufacturers have pre-made corners available that make it easy to get a good water tight seam. The corner shown in Photo 3 bonds with a sealant and provides a 2-inch overlap for a leak-free installation. While all seams are important to the waterproof integrity of the shower, use of a shower door makes this one in particular a critical area.


Photo 6: A small piece of tile can be used at the top of the screed to provide an easy surface to work from.
Now that we have our membrane installed, we need to water test it. This is the bane of many tile setters. If a plumber installs the pan during rough-in, you would be extremely fortunate to not find a leak by the time you get there. This is the reason many tile setters choose to install their own shower pans where code allows. To test the pan you remove the top part of the drain and install a plug below the weep holes (Photo 4). 24 hours is the recommended length of time before checking the water level making sure it has not changed.

Now we are ready to prepare our mortar. Sand and cement are mixed together dry at a ratio of roughly one part cement to four parts sharp sand. When thoroughly mixed you should add a small amount of water or latex additive to wet the mixture to a consistency where a ball in your hand it stays intact when you squeeze it. This does not require a great amount of moisture. If the sand pile is wet, none may be required or it could even possibly be too wet to easily place the mixture. The use of latex is recommended in mortar shower bases to reduce the amount water absorbed in the mix. If latex is added the shower floor should be allowed to thoroughly dry before use.

This may require a cure time of two weeks or more. Now we are almost ready to start "mudding." With any mortar bed that is not bonded to the surface and used over a membrane, wire reinforcing is recommended. As shown in Photo 5, place 16 gauge galvanized reinforcing wire in the bottom of the shower base after distributing an inch or so of mortar under it. If the wire lays on the floor, it does not offer much in the way of reinforcing; it should be suspended in the middle of the floor. If it is not galvanized, the rust may well migrate to the surrounding areas. We have also installed 2.5 expanded metal lathe over our curb. This will be anchored on the shower side by the mortar bed and fastened to the outside of the curb with galvanized roofing nails. Using this method, no holes will be made in our curb. Nailing the wire mesh or backerboard to the inside and top of curbs is a very common cause of failure. The water proofing must not have any penetrations in order to be effective.

Our backerboard has been installed on furr strips so we can have square corners at the bottom. If the adjoining wall surfaces do not allow for furr strips, it may be necessary to notch the studs to accommodate the pan thickness. In this particular shower we have also chosen to set the cement backerboard 2 inches form the floor to allow it to remain above the mortar base, thus preventing the common complaint of wicking. Manufacturers' recommendations vary here.

Most want the board to remain above the mortar and a bead of sealant be applied prior to tile installation. Some prefer to have it anchored in the mortar shower base. The reasoning behind this is that no fastener should penetrate the membrane lower than 3 inches above the curb, which leaves the bottom 8 inches of the panel without fasteners. If the panel is not tight against the wall, there will obviously be both aesthetic and performance issues. We are now ready to install our shower floor.

First we must determine the thickness of the mortar bed and set the drain height accordingly. The finished thickness should be between 1 1/4-inches and 2 inches. Once that is determined, there are several ways to set the height of our finished floor. Photo 6 shows the proper use of what are known as screed piles. A screed pile is basically a pile of sand and cement placed at all four corners of the shower stall and firmly compacted. We then place a level from pile to pile and make sure we are level. It is also a good idea to use an appropriate size straight edge to check across the shower base. A small piece of tile can be used at the top of the screed to provide an easy surface to work from. It is not necessary but makes life much easier if you are not accustomed to mortar work, in particular, setting screeds. Once level, fill the perimeter in and firmly compact the mortar. Take your straight edge and drag it across the tile with a back and forth motion removing the excess material. If you need to add more you must chop up the surface to get it to bond. When done, remove the tile, loosen the mortar and add enough to compact flush with the floor.

Now that we have established a level perimeter we can proceed with filling the remaining floor area. The easiest way to move this mortar around is with a wooden or magnesium float. These types of floats also do not provide a good smooth finish. A rougher finish will mean better bond. Some straightedges will also be required. A good set of aluminum straight edges is a wise investment if you plan on doing much of this work.

In a pinch, any piece of wood will do, but make sure it is straight. Always soak your wood tools and wood screeds or strips in water before use. Tape off the top of the drain assembly to prevent any mortar from dropping down the pipe. Cement sets very well under water, which you don't want to find out. Fill the rest of the floor with the mortar mix about an inch or more above your screeds and try to get it roughly to follow the contour of the slope. The mortar should then be firmly tamped, compacting it to a level slightly above your screed pile (Photo 7). Now you have choice A or B.

Again, there is no right or wrong way; whatever makes you comfortable. You may use the drain and pivot off it to clear the excess material from the drain to your screed, spinning out the drain and compacting again when finished.

Photo 7: The mortar should then be firmly tamped, compacting it to a level slightly above your screed pile.
Or, if you are using wood straightedges, you could notch the wood the thickness of the tile allowing for thinset and leave the drain set. This is a decision you need to make before you start as it could affect the proper pitch, especially in smaller showers. Once you have all that done, give your floor a final rub with a wood float to smooth any inconsistencies. Now we turn our attention to what seems the most problematic area of the shower next to holes in the liner, the curb. As you may remember from early on in our project, NO NAILS in the top or back of the curb. We have anchored or placed wire in the mortar bed and nailed it to the face of the curb. Now we will mix a different batch of mortar known as fat mud or wall mud.

Photo 8: The first thing we do is to scratch this mix firmly into our wire, allowing no voids.
We are using the same proportions as our floor but adding a 1/2 to 1 part lime to make it sticky. This mixture will be wetter also, more to the consistency of mason’s mortar. The first thing we do is scratch this mix firmly into our wire allowing no voids (Photo 8).

Now we will add some additional material to the front, back and top to achieve a minimum finished thickness of 3/4-inch. There are numerous ways to achieve a consistently sized and properly pitched curb.

Photo 9: This unit is designed to be installed directly over a curb and membrane up to the thickness of three 2x4s.
You can set a board on the back side of the curb and use backerboard on the front, filling the top and back. If you’re abutting drywall on the front and backer board on the back, you could fill the top and strike both sides flush to the adjoining surface. Whatever it takes to get it square and flush. Then check your curb with a carpenter’s square to make sure your plumb to the wall. When working with fat mud, you need to allow for some time for the mud to set so you can "shave" the mortar.

Trying to work wet mud into shape is challenging regardless of your experience level. Now if you want to save an hour or two, you can you could use one of the preformed curbs on the market (Photo 9). This unit is designed to be installed directly over a curb and membrane up to the thickness of three 2-by-4s. They are available from several manufacturers. As mentioned early on in our article there are many premade components available, up to and including complete tile ready shower bases.

We hope this article helped take some of the mystery out of long-lasting watertight showers. This is by no means the only way to construct a proper shower. The important considerations are prepitching the membrane, protect the weep holes, making sure it is watertight by flood testing, and paying close attention to the curb. Some of the modern materials available today will no doubt continue to alter the way showers are constructed. Most make it much simpler. But for the time being, some variation of the traditional shower stall will continue to rein as king, and it stands the test of time, when properly constructed.