Photo 1

Photo 2

Photo 3
From this single inspection, the job the customer had called me about had gone from a simple re-sealing of grout to a total replacement job costing well over $60,000. Although I have been in the floor covering installation trade for over 33 years and had been setting tile for 26 of those years, I knew better than to take on a job of this magnitude without the help and guidance of the manufacturers involved. I was also fortunate to have a wealth of information available to me through my Certified Floorcovering Installers Association (CFI) associates – a service available to anyone who wishes to seek out their knowledge. With products and installation procedures constantly changing, having an organization such as CFI that works diligently to educate and train installers on the most updated products and installation techniques available in the flooring industry is imperative. Taking advantage of these resources gives any job a much better chance of success and long-term survival.

Photo 4
I wish I had “before” photos to share, but I don’t. By the time I got back to start the job the building contractor had already removed the ceramic tile, as well as the backer board and the subfloor, and reworked the roof over the existing dwelling directly under the deck. He had already installed a new subfloor, too. Our original plan was to start at the house with the subfloor and allow a ¼-inch per foot slope to the outside of the deck and installing a mini-gutter. This would have allowed us to eliminate the two floor drains and all of the plumbing. Unfortunately, though, an I-beam was in the way, preventing us from doing so. Instead, we were forced to install the floor drains using 3-inch drainage pipe instead of the 1-inch used previously in order to move the water from the deck much quicker.

Photo 5

Photo 6
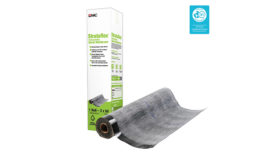
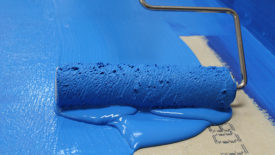
Photo 3 shows that the membrane has been installed with a waterproof band on all the seams and all the edges include flashing the band up the walls of the house with waterproof preformed outside corners on the rail posts.
The correct placement in the installation of thermal expansion and contraction movement joints (sometimes called “soft joints”) is critical, as shown in Photo 4. Without the use of these movement joints, changes in temperature could result in tiles de-bonding and/or tenting, tile breakage, grouts cracking, coming loose, etc. These joints need to be placed every 8 to 12 feet in both directions on an exterior application. I chose to use a prefabricated, maintenance-free surface movement joint profile system, which is installed as the tile is set.
Movement joints must be placed at every abutment (Photo 5). Note that the ceramic tile has purposely been cut a minimum of 1/8-inch shorter around the rail posts. To allow for expansion and contraction (or movement), this void must remain free of mortar, grout, or any other hard substance.
Photo 6 shows the finished job. Remember, the job is not finished until the maintenance is done. Homeowners need to understand that this is not the time to skimp on the proper cleaners and sealers – this tile floor will be forced to deal with all the elements of nature and must be prepared to do so.
Report Abusive Comment