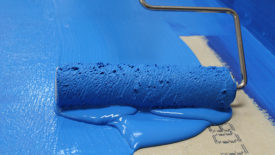
Water-based adhesives spread easily and clean up with water.


Water-based adhesives provide long open times, which allow installers to increase their production dramatically.

Some of the most important and key aspects of a successful hardwood flooring installation can often times be of the most basic nature. Proper fundamentals for a successful hardwood flooring installation are not only extremely important, but essential. What may be construed as a simple facet of any given installation is typically the foundation of its overall integrity and will ultimately have the biggest impact on its success. Some of the “adhesive basics” we will discuss that hold a high level of importance for any successful hardwood flooring installation, include:

1. Choosing and Using the Recommended Adhesive

2. Subfloor Preparation

3. Clean-up

Sounds easy enough doesn’t it? Well, when understood and executed properly, these three simple “adhesive basics” can help achieve and save the very foundation of what a business is built on; happy customers, time and money.

We will start with using the recommended adhesive. There are several different types of hardwood flooring adhesives available on the market; pressure sensitive, acrylic/latex polymers, modified-saline (MS) polymers and moisture cured urethane adhesives. Often times, the type of hardwood flooring installed will dictate which adhesives can and can’t be used. This information should be obtained through the manufacturers of both the adhesive and the hardwood flooring. For example, if you’re installing a ¾” solid hardwood flooring product, neither the adhesive nor wood flooring manufacturer would recommend an acrylic/latex polymer product and instead would most likely point you in the direction of a urethane or ms polymer adhesive.

Once the recommended adhesives have been presented to you, it then becomes the installer’s preference as to which type of adhesive they would like to use. Pressure-sensitive adhesives are extremely easy-to-use. They are very easy to clean up and typically offer long open times and require a flash-off installation. To some, this is a negative, as some installers prefer the ability to apply their adhesive and wet-lay the flooring immediately thereafter. For others, the long open time allows them to apply adhesive to a large area at one time and work on top of the wood flooring. This method is typically used in larger scale projects and dramatically increases productivity, therefore saving the installer valuable time. Again, as is often the case, it comes down to installer preference.

Acrylic/latex polymer adhesives are also easy-to-use and clean up. They offer a wet-lay installation and a working time of approximately 30-40 minutes, depending on the individual product and site conditions.

Moisture cured urethane adhesives have been among the most popular for several years now, as many installers desire the “insurance policy” aspect this adhesive technology provides. Many urethane adhesives have vapor-retarding characteristics and a tenacious and permanent bond strength. In recent years, urethane adhesives have become easier to dispense and trowel, however, a true moisture cured urethane adhesive will never be mistaken for an acrylic/latex polymer adhesive when it comes to ease of use, trowelability and clean up. Urethane adhesives are easy to clean when wet with a urethane adhesive remover or like product, but can cause problems and become very difficult to remove once the adhesive has cured.

Enhanced and advanced versions of urethane-based adhesive technologies have become the latest and most innovative solutions on the market today. One-component, multi-functional urethane products that encompass several solutions in one pail have successfully captured market share. The ability to offer an installer a product that acts as a urethane adhesive, concrete moisture sealer, sound control system and crack suppressant has proven to be a great value to flooring installers. Installers can now accomplish in one day, what it normally takes two or more days to complete.

MS Polymer adhesives, more common in Europe, have found a small niche here in the states. They are typically easy-to-use and clean up.

All of the aforementioned adhesive technologies can make for successful hardwood flooring installations as long as the installation instructions are followed. It simply comes down to installer and end-user preference.

Once the adhesive has been chosen, the next most basic, crucial and extremely important part of a successful hardwood flooring installation is subfloor and jobsite preparation. This portion of any flooring installation cannot be underestimated. Subfloor preparation, or lack thereof, is one of the most common factors for inducing flooring problems that arise after the installation has been completed. Whether it’s hollow spots, or a floor that’s cupping, most problems can be avoided if the proper preparation is done prior to installing the hardwood flooring product. We can break down subfloor preparation into four basic steps and they are as follows:

Water-based adhesives provide long open times, which allow installers to increase their production dramatically.

Step 1: Clean your subfloor.


The first step in preparing a substrate is cleaning. Before installing the wood flooring, prepare the substrate by removing existing floor coverings, adhesives, patch residue, dirt, paint, grease, oil, sealers, waxes, curing compounds, or any contaminate that would hinder a good adhesive bond.

The substrate should be sanded with a floor buffer and (20) grit or 3 ½  coarse sand paper. After it is sanded, the subfloor should be swept and vacuumed.

Step 2: Flatten the substrate if it is uneven.


To avoid having to re-do the installation, it is better to make sure you’re working with a flat substrate. Industry standards for the flatness of concrete when installing wood flooring are 3/16 of an inch in 10 ft and 1/8 of an inch in 6 feet. This can be verified using a strait edge, a level, or a laser. If the substrate is not within industry requirements, a floor-leveling compound must be used to bring the substrate to acceptable tolerances. One way of doing this is by filling low areas of the concrete with an approved portland cement leveling compound. For the high areas, try grinding them with a grinder or corundum blade.

Step 3: Inspect the sub floor for moisture, cracks, and unevenness.


Moisture is another important thing to consider while preparing the substrate. If the subfloor is damp, or shows visible signs of moisture, it should be allowed to dry before the wood flooring installation. Excessive moisture can cause adhesive bond release, discoloration, cracks or checks in the finish and curling or buckling of the wood flooring. Prevent these problems during installation preparation and you will save yourself a lot of time and money.

Step 4: Do proper moisture and PH testing.


When preparing to install wood flooring over a concrete substrate, it is important to remember one thing: pre-installation surface preparation and moisture testing is a must for all moisture control systems. It is important to remember that all test sites should be cleaned at least 24 hours prior to setting the tests.

All moisture tests should be well documented and kept on file. Also, take photographs of the test sites during the installation process and keep them with the test data. This will show a clear picture of the installation progress.

Once the sub floor has been properly cleaned, made flat, checked for moisture, treated or sealed if necessary, the installation of the wood flooring is a much easier and more successful process.

If your subfloor is not properly prepared prior to installing your hardwood flooring, you’re only wasting your time and money and opening yourself up to the possibility of expensive repairs and replacements. Unfortunately, this is a painful lesson many installers have learned along the way.

The third and final “adhesive basic” we would like to discuss with you today is cleanup of the adhesive. It sounds fairly easy and harmless, however, it is one of the top callbacks an installer receives, especially when using a urethane adhesive. As discussed earlier in this article, when wet, urethane adhesives can be cleaned up easily with a urethane adhesive remover or like product. However, when dried it can leave an ugly mess that takes up more time and money than any installer would care to imagine.

Homeowners want their floors as they envisioned, looking beautiful, pristine and clean. Unsightly smudges, hazes, or glue residue only decreases their satisfaction, eats up your time and deters your flowing stream of positive referrals that can affect your business substantially. The key to all of this may seem as simple as the problem itself; and that is to clean up as you go. Make sure you keep a urethane adhesive remover or like product handy and available at all times. If some adhesive gets on the top of the flooring, wipe it off and clean it immediately. You will save yourself time and money in the long run and it will help you to ensure a successful installation, which will only result in happy customers and a better bottom line.

Adhesive Definitions


Adhesive: A substance capable of sticking to surfaces and bonding them together when cured.

Bond Strength: The pounds per square inch, PSI, needed to separate two surfaces that are bonded together with adhesive.

Cure Time: The time it takes for an adhesive to develop bond strength.

Flash time: The time required after applying the adhesive to the substrate before installing the flooring into the adhesive.

Live-In Conditions: The temperature and relative humidity level in a controlled environment. 75 +/- 10 degrees Fahrenheit and 50 +/- 10% relative humidity.

  Open time: The time an installer has to install the flooring into freshly spread adhesive before in begins to skim over.

Spread rate: The recommended amount of adhesive required to bond different types and thickness/widths of flooring to different types of approved substrates. Measured in square feet per gallon.