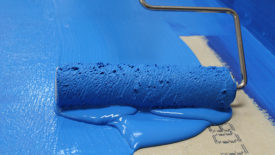
Photo 1

Photo 2

Photo 3
With more and more of the industry seeing the advantages and ease of application of self-leveling underlayments (SLU), the use of these products has increased dramatically over the past few years. Even though the products are fairly easy to use, there are some important installation guidelines that need to be followed for a successful installation. Though most all self-leveling underlayments seem to be installed the same way, there may be a few slight differences with each, so make sure to read the instructions for each manufacturer. So let’s go through the basics of a self-leveling project. You will need to establish whether the substrate needs to be level or flat. In the flooring industry, we typically require a “flat” substrate, so make sure you identify this in your contract. Self-leveling underlayment implies that the product will be level; this has caused some big headaches with contractors who have not covered this at point of sale. Next comes estimating the thickness of the self-leveling product. The use of string lines, lasers, or a straight edge, to check the undulation of the substrate can be used to determine the thickness the SLU needs to be; 1/4” to 3/8” is commonly used.

Photo 4

Photo 5
Scarification and even shot-blasting may be required (Photos 1 and 2). SLU products will flow; what that means is that if there are any cracks, holes in the substrate, or gaps along walls, the material will flow right through. If you are above grade or only doing certain areas, you will need to do a couple of things. First, use a sealant around the perimeter filling in the voids (Photos 3 and 4). For cracks and holes, use either a floor patching compound or an epoxy, as shown in Photo 5.

Photo 6

Photo 7

Photo 8

Photo 9

Photo 10
First of all, self leveling underlayments don’t completely “self” level themselves. The material must be assisted with a screed bar and then will level within itself. SLU products can be pumped (Photos 9 and 10) for large pours.

Photo 11

Photo 12

Photo 13

Photo 14
I had the opportunity to help a friend in Tucson, Arizona last summer and we did a 200-bag pour in a home. The outside temperature over 100 degrees, water temperature out of the tap, 82 degrees measured with an infrared thermometer. We ended up placing our mix water in two large garbage cans. We filled these with water and ice just to keep the water cool, and ended up using 225 pounds of ice. The cool water is necessary to allow the product time to flow. For those of you in hot regions, don’t forget the ice!

Photo 15
How much manpower is needed? For 50 bags or more, I like to use four applicators, one to be on the mixer, two to carry the barrels, and one person using the screed bar and smoothing trowel. If you can use a hand dolly to transport the barrel, the extra hand can follow the screed person with the smoothing trowel. You will also want to have some shoes that you can discard or a pair of non-metallic cleats. So what about pours with control joints, expansion joints, or isolation joints? Manufacturers state that these types of joints need to be honored, meaning that the joint needs to extend up through the SLU. If this is not practical for the type of flooring being installed, contact the manufacturer of the SLU to determine if there are some alternate installation methods that can be utilized.

Photo 16
If you are going to be using the barrel mix application, depending on the size of the pour, you may want multiple barrels so that you can maintain a constant pour, I recommend at least two barrels. When you purchase the kit, there are pre-measured buckets that you can use. You can also make your own, measure the amount of water required for two bags, pour it in the bucket and mark with a marker. Empty the bucket and cut out a notch. This gives you a pre-measured bucket that will take care of two bags (Photo 14). Make sure everyone has a protective dust mask. Fill the barrel with water first, then add the bags of SLU. Many manufacturers have a recommended mixing time; use a watch as two to three minutes seem a lot longer when mixing (Photos 15 and 16).

Photo 17

Photo 18

Photo 19

Photo 20
When installing over a gypsum based pour, it will be necessary to use a SLU that is compatible with the gypsum. The advantage that the gypsum-based SLUs have is a higher compressive strength than the actual gypsum that is pumped in as the subfloor; these products are recommended over wood subfloors also. Make sure to follow the manufacturer’s recommended installation guidelines. The biggest difference between the Portland-based SLU and a gypsum-based SLU for the installer is drying time. A gypsum-based SLU requires more drying time, typically 3 days or more before any flooring can be installed over the top. Remember, if using a self-leveling underlayment, you cannot use fasteners; the flooring will need to be either a glue-direct or floating floor only. Thanks to the crew from Richardson flooring, Salt Lake City, Utah, and Ardex for assistance with photos.