Photo 1

Photo 2

Photo 3
Prior to Installation Day
1. Any installation should begin with a job site evaluation. Check conditions outside and inside the home. Outside, check for water sources that could be a problem. Are gutters in place and working? Look at the foundation walls; any signs of mold or mildew could indicate a problem.

Photo 4
2. Inside, check moisture levels of the subfloor. Wood moisture content should be less than 14%. If the room is over a crawl space or basement, check the conditions. Crawl spaces need proper ventilation and a 6 mill poly film covering the entire ground. Basements should be dry. Look for cracked or peeling paint on walls. Always use a moisture meter and record your results. Record subfloor thickness, joist spacing and any relevant information.
3. On concrete subfloors, the maximum acceptable moisture reading is 4.5 when using a Tramex Moisture Encounter. Other meters will have a different number for acceptance. It is important to know your meter and how to use it.
Starting the Installation
1. Check and record all moisture readings again before beginning. (Photo 1)
2. Remove the furniture that you can from the room, cover the rest with plastic.
3. Think about dust control and ventilation. Seal off door opening to adjoining rooms with plastic.

Photo 5
4. Check the subfloor for flatness. I use 2 planks connected to make a straight edge. (Photo 2)
5. Flatness requirements of 3/16” in 10 are typical. Always check with the flooring manufacturer for their requirements.
6. Sand or grind high spots. Fill low spots with Portland-based leveling compounds approved for this application. (Photo 3)
7. Allow the patching compound to dry thoroughly before proceeding with the installation.
8. Check the subfloor for deflection. Deflection can result in a squeaky floor.

Photo 6
9. Adjust jamb saw for the proper height and under cut all door jambs. (Photos 4 and 5)
10. It is also necessary to cut the baseboard back from the casing about one inch. This will give the floor room to move in all directions. (Photo 6)

Photo 7
Clean Up
1. Vacuum and clean up all dust and debris. Debris left under the floor is another cause of squeaky laminate floors.
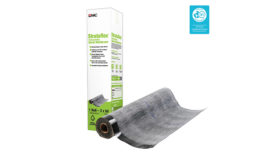
2. Cover all concrete floors with a non-recycled polyethylene film as a moisture barrier. Overlap the edges 8” or follow the manufacturer’s instructions. A moisture barrier is mandatory on all concrete regardless of grade level. (Photo 7)

Photo 8
Layout
“Give me six hours to chop down a tree and I will spend the first four sharpening the axe.”
- Abraham Lincoln 1. Time spent in planning and layout can save a lot of time and grief later.
2. Determine if the walls are square and straight. They’re usually not.
3. Determine what size plank to start with. Most manufacturers recommend that the starting and finish rows be wider than 2 inches, and we usually want to balance the room, while making allowances for obstacles and door openings.
4. For plank designs, it’s usually enough to measure the width if the room and divide by the width of one plank. If the remainder is 2” or less, cut down the width of the first row to allow the last row to be more than 2”.
5. To balance the width of a pattern in the room, add the width of the last row to the width of a full plank and divide by 2. The answer is the width of the first and last rows. For example, if the width of the last row is 5” wide, add 5” to the width of a plank, let’s say 7¾, to get 12¾. Divide by 2 and get 6 3/8” which is the width of the first and last rows.

Photo 9
6. To begin the installation, strike a primary line 6¾:” from the wall, 6 3/8” plus 3/8” for expansion.
7. Lay the first row on the line and use a small piece of the flooring to scribe a line on the planks. (Photo 8)
8. Cut on the line, and get your starting row. I usually complete this process before laying out my underlayment. After the first row is cut I add the underlayment and begin.

Photo 10
Possible Obstructions
It is critical that the proper expansion is left at all walls and vertical obstructions. Where I live, radiators are common and an inconvenience. This is where planning can help. If I can plan for the joint to fall at the legs it is a little easier. Ideally, there is a radiator cover to hide my cuts but that usually doesn’t happen. I also always check for slack in the pipe so I can lift the radiator high enough to put the floor under the legs than I only have to cut around the pipe. Otherwise, I cut around everything.

Photo 11
Making the Cuts
1. Start by finding the center of the pipe or leg. Drill a hole using a paddle bit that is at least ½” to ¾” bigger than the pipe to allow for expansion.

Photo 12
2. Start drilling the hole from the top of the plank. When the points break through the laminate, turn the plank over and complete the hole from the bottom. (Photos 9-12)

Photo 13
3. Next, cut through the center of the hole with a sliding miter saw. When putting the boards back together rub glue on the edges.

Photo 14

Photo 15
4. NOTE: I have a table that I made to do all of the drilling and special cutting.

Photo 16

Photo 17
5. Finish up by filling the gaps with matching colored silicone. (Photos 16 and 17)
Report Abusive Comment