In last month’s issue, we spoke to manufacturers about how to properly use patches, primers and self-levelers in a wide range of situations. In our second look at underlayments, we cover backerboards and crack isolation membranes, as well as flooring underlayments for hard surface products including laminate, resilient and hardwood – finding out the best way to use them and any tips to help the installation go more smoothly.

Backerboards. Steve Taylor, Custom Building Products director of technical and architectural marketing, said when a backerboard is used to prepare a floor it is important to have a bedding mortar beneath it. “Many times we find the backerboard is just placed over a wood substrate and screwed down. This creates a void between the backerboard and the wood substrate. Before installing the backerboard, a troweled layer of cement mortar should be spread over the substrate.”

Did you miss the first part of this article?
Part 1: Primers, Patches and Self-Levelers

Another common mistake is aligning joints between the backerboard with the joints in the substrate. “Backerboard should be staggered to assure the four corners do not meet. A sufficient number of the proper screws should be used when installing backerboard over wood substrates, and be sure to follow manufacturer directions for the placement of mechanical fasteners.”

Jeb Broomell, USG product marketing manager, tile & flooring, also stressed the importance of following manufacturer directions. “The use of drywall tape and fasteners is a common mistake when using Durock or Fiberock.  In any tile application it is critical to use corrosion-resistant fasteners with the appropriate tape, such as Durock Tile Backer Tape.”

Crack isolation membranes. Craig Morris, Ardex technical service manager, said most crack isolation membranes will protect up to 1/8” or 3mm. “Anything wider than this may be indicative of a more serious structural issue within the concrete.”

He added that no crack isolation products will protect against vertical movement. “Vertical movement (displacement) associated with a crack is indicative of a potential structural deficiency. Consult a structural engineer to verify the integrity of the slab prior to proceeding with flooring installation.” Morris also noted crack isolation membranes should not be installed over any moving joints in the concrete, such as an expansion or isolation joint.

Taylor said while crack isolation membranes are designed to function over cracks with up to 1/8” movement, many products on the market “claim they can be installed over cracks with movement up to 3/8”. Large cracks should be filled before the installation of the crack isolation membrane with an appropriate patching material.”

He noted that in most cases where cracks are visible, the entire floor should be covered with a membrane as opposed to just an isolated section. “At the time of installation, you can see where the floor has already cracked, but do not know where new cracks will form. However, if one chooses to only cover the existing cracks, it is important that the tile spanning the crack is completely isolated from the substrate. The best way to achieve this is to cover the existing crack in the substrate with crack isolation membrane that is three times the width of the tile.”

Ron Loffredo, senior area technical manager for H.B. Fuller Construction Products/Tec, said his company’s membrane, when used in an isolated area, uses the following metric: “On both sides of the crack and the slab fracture, the crack isolation membrane needs to have a minimum area of 12 inches or an area equivalent to a tile-and-one-half wide, whichever is greater.”

Jay Conrad, Laticrete product manager, added that when working with a membrane in an isolated area “the tile installed over the crack cannot be in contact with the concrete.”

Jeff Johnson, MAPEI Floor Covering Installation Systems business manager, noted that crack isolation membranes are available in a variety of formats, and will generally protect against movement from 1/8” up to 3/8” depending on how they are engineered. “Some are in liquid form that are applied by paint rollers; others are peel-and-stick asphaltic sheets, while others are formed plastic membranes with heat-fused fabric bonding surfaces.”

Anamaria Cindric, marketing for Keene Building Products/Dependable, said a crack isolation or uncoupling mat is highly recommended when tile is installed over a wooden substrate. “It will add strength to the surface as well as provide crack isolation between the tile and subfloor. When installing over wood, waterproofing a surface – particularly in a wet area such as bathrooms or kitchens – is also highly recommended. A waterproofing underlayment will help prevent water from damaging the wood subfloor, which would cause long-term damage.”

Brian Petit, NAC Products vice president of operations, had this to say about properly using his company’s crack isolation membranes: “Only one side of each tile should be af?xedto the sub?oor. This will allow the sub?oor to move in-plane while the membrane absorbs the stress of that movement. Tile should never be af?xed directly to the sub?oor on both sides of the membrane.”

Richard Maurer, marketing for Noble Co., said his company’s product is a composite, comprising embedded fiber on both sides of a membrane made from chlorinated polyethylene (CPE). “The fiber provides bondable surfaces. CPE is waterproof and inherently elastic.”

He stated when using an isolated strip “place at least one soft joint close to the crack or joint. It doesn’t have to reflect the joint, just close. That helps allow for the movement in the tile field. Also, it is important to keep in mind that installing a crack isolation membrane does not negate movement joints.”

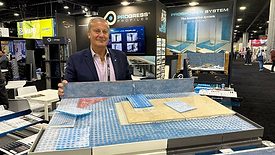
Domenico Borrelli, vice president and CEO of Progress Profiles America and its recently unveiled Prodesco Heat system, said using crack isolation membranes does not mean expansion joints can be ignored. “Once it’s full of thin-set, the membrane becomes a layer that cannot be compressed. There is a limit to the expansion that a tile can tolerate. You still need an expansion joint.”

Mike Boenisch, ProSpec technical services manager, stressed that crack isolation membranes should be used for in-plane movement only and never vertical movement. “Crack isolation and anti-fracture underlayment isolates up to 3/8” (10 mm) horizontal movement [and] 1/4” (6 mm) for partial coverage, as recommended in the TCNA Handbook.”

QEP’s Matt Glenn, product manager, said his company’s Homelux D-Lux Gold mat is designed to alleviate stress caused by lateral movement within the substrate. “Our recommendation for application is not to simply ‘band-aid’ the isolated area but create a system to separate your newly installed floor from your damaged substrate.”

Sean Gerolimatos, Schluter Systems technical director, is wary of putting his company’s Ditra in the crack isolation membrane category. “With respect to specific Schluter products, Kerdi-Board is used as a backerboard on walls in most applications, but it is very different from traditional cement-based backerboards and is not used on floors; in the same vein, Ditra can be used over cracked concrete, but it isn’t really a crack isolation membrane.”

Schonox’s Russell Wright, southeast regional business manager, stated that crack isolating systems “reduce the risk of crack transmission in tile and stone floor installations on top, but they do not bridge or cover any type of structural crack, expansion, control, construction, cold or saw-cut joints.”

Alan Kin, sales and technical at Texrite, noted that cracks 3/16”, 1/4” or larger can “pose a concern for slab or structure repair that should be addressed before installing a flooring product. One cannot and should not rely on the crack isolation membrane and finished floor to hold the substrate or slab together.”

He added that whenever possible, full coverage of the slab with a crack isolation product is better than only partial coverage. “While partial protection or strip usage addresses those areas that are recognized to have current cracks in the substrate, full coverage of an area addresses protection from both the current crack appearance as well as any future cracks that can occur. A full application can also be used if substrate vibration is anticipated.”

Other flooring underlayments.“I recommend flooring underlayment for hardwood floors. It’s a moisture-resistant barrier that prevents the flooring from cupping and buckling,” said Mike Fields, Barricade Building Products vice president of sales. “When choosing an underlayment, look for something that is both asphalt-free and is a moisture-resistant barrier. When installing the product, make sure your subfloor is free of debris and level, and all seams are overlapped and taped.”

Cal-Flor Accessory Systems’ Product Development Director Todd Hall, who recently introduced the SilverStep fan-fold underlayment product, said the market for flooring underlayment continues to evolve. “LVT is opening up to be a big user of very thin, high-density foams that improve the performance, quality and feel of an already popular material. Engineered wood floor also keep changing with new design styles that use underlayments for thinner, thicker, narrower and wider planks than in the past.”

Fahren Green, Halex Corp. regional manager, shared a common installation error when it comes to working with wooden underlayment. “Always use a top-quality staple, and never bounce the stapler from spot to spot. This doesn’t create a firm hold. Also, do not use staples where the length protrudes through the subfloor underneath – most of the hold strength in a staple is in the tip, and if it blows through the subfloor you’re losing all that holding capacity.” He also advised that contractors acclimate wooden underlayment for at least 24 hours before installing it. “It’s not a common thing that contractors do, but the underlayment will expand and contract depending on the humidity and I assure you it is a best practice.”

Duane Reimer, MP Global Products technical director, said both laminate and floating engineered hardwood flooring generally require underlayment. “Without underlayment, these floors would be unpleasantly loud. The padding really does absorb noise, and also helps to spread and dampen structural impact to the floor. It is wise to follow North American Laminate Floor Association (NALFA) standards and make sure your underlayment meets the NALFA minimums of performance. Look for the NALFA Qualified Certified Laminate Underlayment logo on the package.”

Added Kelly Kennedy, the company’s national sales manager, “Underlayment should be used in any installation where a sound rating is required. Any condominium or high-rise apartment in metro areas, or any area where there is local code, will have minimum requirements so sound does not transfer to the apartment below. Most floor coverings by themselves don’t reach the minimum sound requirements of condo associations.”

Bob Cummings, Pak-Lite sales manager, noted that technology for underlayment is always advancing. “We have been improving this process with new technologies in foam which include crosslinked polyethylenes, crosslinked polypropylenes as well as extruded polystyrenes. Recently, we have incorporated patent-pending proprietary manufacturing techniques into our vinyl flooring underlayment production. Our new Wunderlayment family of acoustic underlayments specifically targets the LVT and LVP flooring market.”

He added that both laminate and floating engineered hardwood flooring require some type of underlayment. “The exception may be where an engineered hardwood floor is glued directly to the subfloor, and then only when situated at or below grade. In the case of laminate flooring, there are no exceptions to using an underlayment.” He also said to be wary of IIC (impact isolation class) and STC (sound transmission class) ratings on any underlayment packaging without first corroborating the numbers. “Make sure any quality or test reports are substantiated.”