Expert installers must pay close attention to detail. It is very evident in the installation of stair treads and transitions. Floor Covering Installer recently asked an expert on how to successfully install these flooring accessories. Greg Paul is the regional manager of Fishman Flooring Solutions’ Mid-Atlantic Region, responsible for the company’s sales function in five states and the District of Columbia. During his 14-year flooring industry career, he has gained expertise in virtually all aspects of flooring installation.


FCI: On a scale of 1-10 with 10 being highly complicated, how difficult is installing stair treads compared to regular flooring?  

Paul: I’d say it’s a seven. It’s not as difficult as installing sheet vinyl, ceramic or carpet with hard-to-match patterns, but it’s much harder to install than non-patterned carpet and basic LVT and VCT. Said another way, properly installing stair treads isn’t a do-it-yourself job for the weekend warrior. 


FCI: What are the two most important factors in successfully installing stair treads?

Paul: First, having the proper tools, such as a scriber for marking cuts, a divider for accurate measurements and a proper notch trowel to apply adhesive. Second, the site conditions must be correct. The temperature should be between 65 and 85 degrees; the ambient relative humidity between 40 and 60 percent; and the HVAC system must be running to avoid issues with the treads expanding and contracting. 


FCI: Are there some common errors you see when it comes to installing stair treads?

Paul: I think the most common error is tread that does not fit properly. The installer should be able to press down on the nose of the tread without it moving. If there is movement, the fit isn’t right and the tread could crack or break.

Another common error is installers not properly handling the treads. For example, carrying treads with grit tape over the installer’s shoulder can cause the grit tape to pucker in the middle and compromise the integrity of the nosing. The proper way to carry treads is flat, so they don’t flex or bend.  


FCI: Is there a step-by-step process for installing stair treads? 

Paul: The installation process for stair treads can vary some from product to product. So, it’s very important to reference the manufacturer’s website for installation specifics. Having said that, there are some basic steps for most stair tread installations.

First, the steps need to be prepped to accept the treads. The substrate must be free and clear of old adhesive, flooring curing compounds, paint, crayon markings and any other potential bond breakers.

Second, a scriber should be used to mark where to cut and trim the treads. After the treads are cut, they should be dry laid and inspected for proper fit. Also, when installing a tread with grit tape, the salvage edge of the grit tape must be trimmed off about an inch in from each stringer to prevent puckering due to expansion pressure.

Third, the back of the tread should be wiped with denatured alcohol to clean off any potential bond breakers.

Next, the adhesive should be applied using the recommended trowel notch. Leave a one-half inch area by the nose if the edge of the step is damaged or there is a gap in the fit. That way, epoxy nose caulk can be used to fix the damaged edge or fill the gap. It’s important to ensure that the tread is set into the adhesive within the recommended working time for the best possible bond.

Finally, foot traffic should be restricted for 12 to 24 hours after installations where tread adhesive, epoxy nose caulk or contact cement are used and heavy traffic should be restricted for 72 hours. If a tape installation system does not require nose caulk or contact cement, traffic restrictions on the stairs aren’t necessary.


FCI: Are there new stair tread technologies that you would call game changers? 

Paul: Tarkett’s Angle Fit treads have really made a big difference because of their nosing design which, in most cases, doesn’t require nose caulk.  Instead of scribing the bottom of the nosing into the risers, the new design enables the installer to simply overlap the top of the riser material, which saves a lot of valuable time.


FCI: How important are transitions to a successful flooring installation?  

Paul: Transitions are extremely important. A great installation job can be ruined if the transition isn’t right visually or it is improperly installed. Transitions must be as smooth and flush as possible so that there is a natural flow from one room to the next.


FCI: Are there any secrets for successfully installing transitions?

Paul: As with all types of flooring, it’s critical to start with a clean, dry substrate and ensure that you use the right adhesive in the right amount. Also, vinyl transitions, just like vinyl and rubber stair treads, are intended for interior climatized environments only. If the transitions are exposed to large temperature swings, they can expand and contract, leading to a failed installation. Also, track and vinyl cap systems should not be stretched, because they will return to their original form and gaps may appear over time.


FCI: How have transition products changed?  

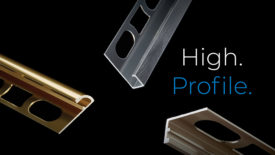
Paul: Today, there are many more options in vinyl, metal and wood transitions that make for a safer, smoother, cleaner, more aesthetically-pleasing job than there were five years ago. Schluter and Futura come to mind as manufacturers marketing a wide variety of transitions in a range of colors to accommodate any flooring need. Also, there are heavier transitions now available to better handle wheel traffic. For example, Tredsafe makes a variety of aluminum transitions and ramps for use  in situations where vinyl transitions may not work.


FCI: What qualities make an installer an expert at stair treads and transitions? 

Paul: It essentially boils down to training and experience. On the training side, highly qualified installers have attended workshops or training events conducted by product manufacturers, distributors or other qualified trainers. 

At Fishman, we’re constantly striving to improve the customer experience. We do that by offering installation demonstrations and training at customer locations or jobsites or online. It’s all part of Fishman delighting the customer.

As for experience, the most experienced installers know how the components of the installation, such as adhesives, contact cement and nose caulk, work together. They also pay attention to detail. That includes measuring precisely, properly prepping the substrate, ensuring that the temperature range at the jobsite is within guidelines and making sure that the tread fits correctly.